Brief
Semantics and relation.
[ University Project ]
In this project, the main task consisted of developing three different control elements, which are semantically uniform and make sense in relation to their application. High priorities were intuitive operation and design, which indicate their function and hierarchy.
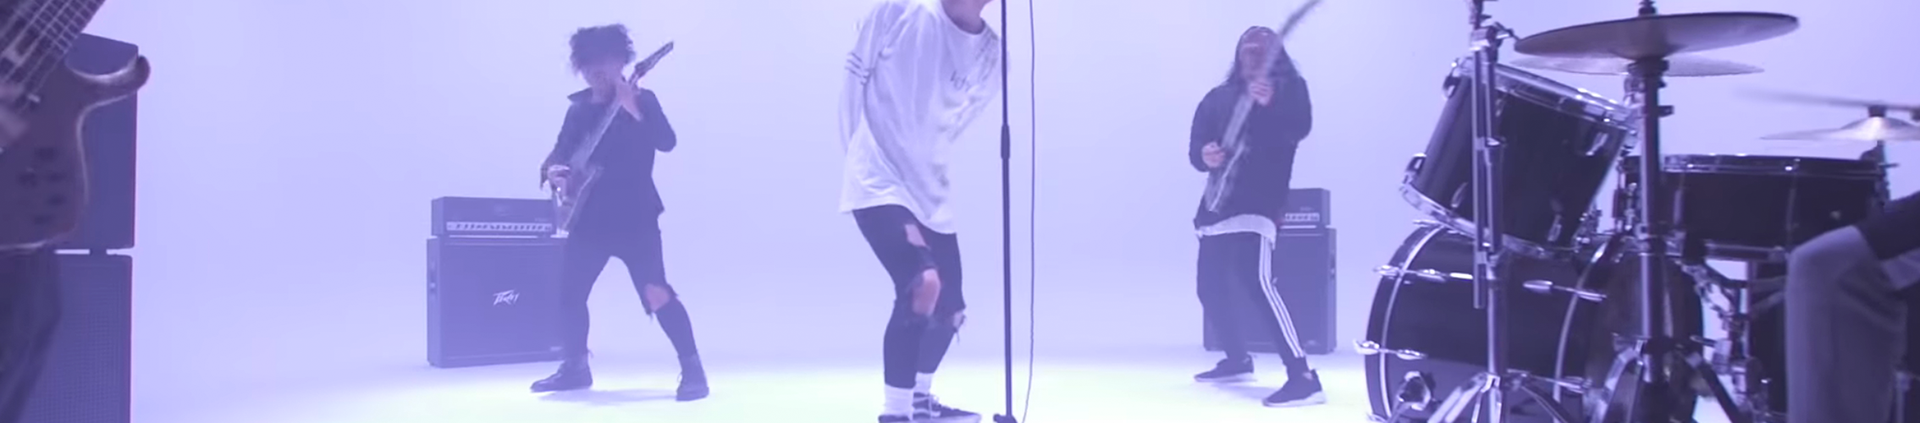
Inspiration
Modern Sub-genres of Metal


Research
What makes a good control element?
The research covers existing control elements, observing their strengths and weaknesses in relation to their function, environment and the product language of the respective switches, buttons and levers.
Good control elements indicate their respective roles and hierarchy to guide users through their functions effortlessly. They often rely on familiar shapes and structures, with which users have learned to associate certain functions and actions.
The direction of operation can be hard to imply by the elements themselves. However, guiding elements such as parting lines, guide rails, rotary axes, scales lighting and others can help clarify how the elements are to be operated and place them in a comprehensible context.
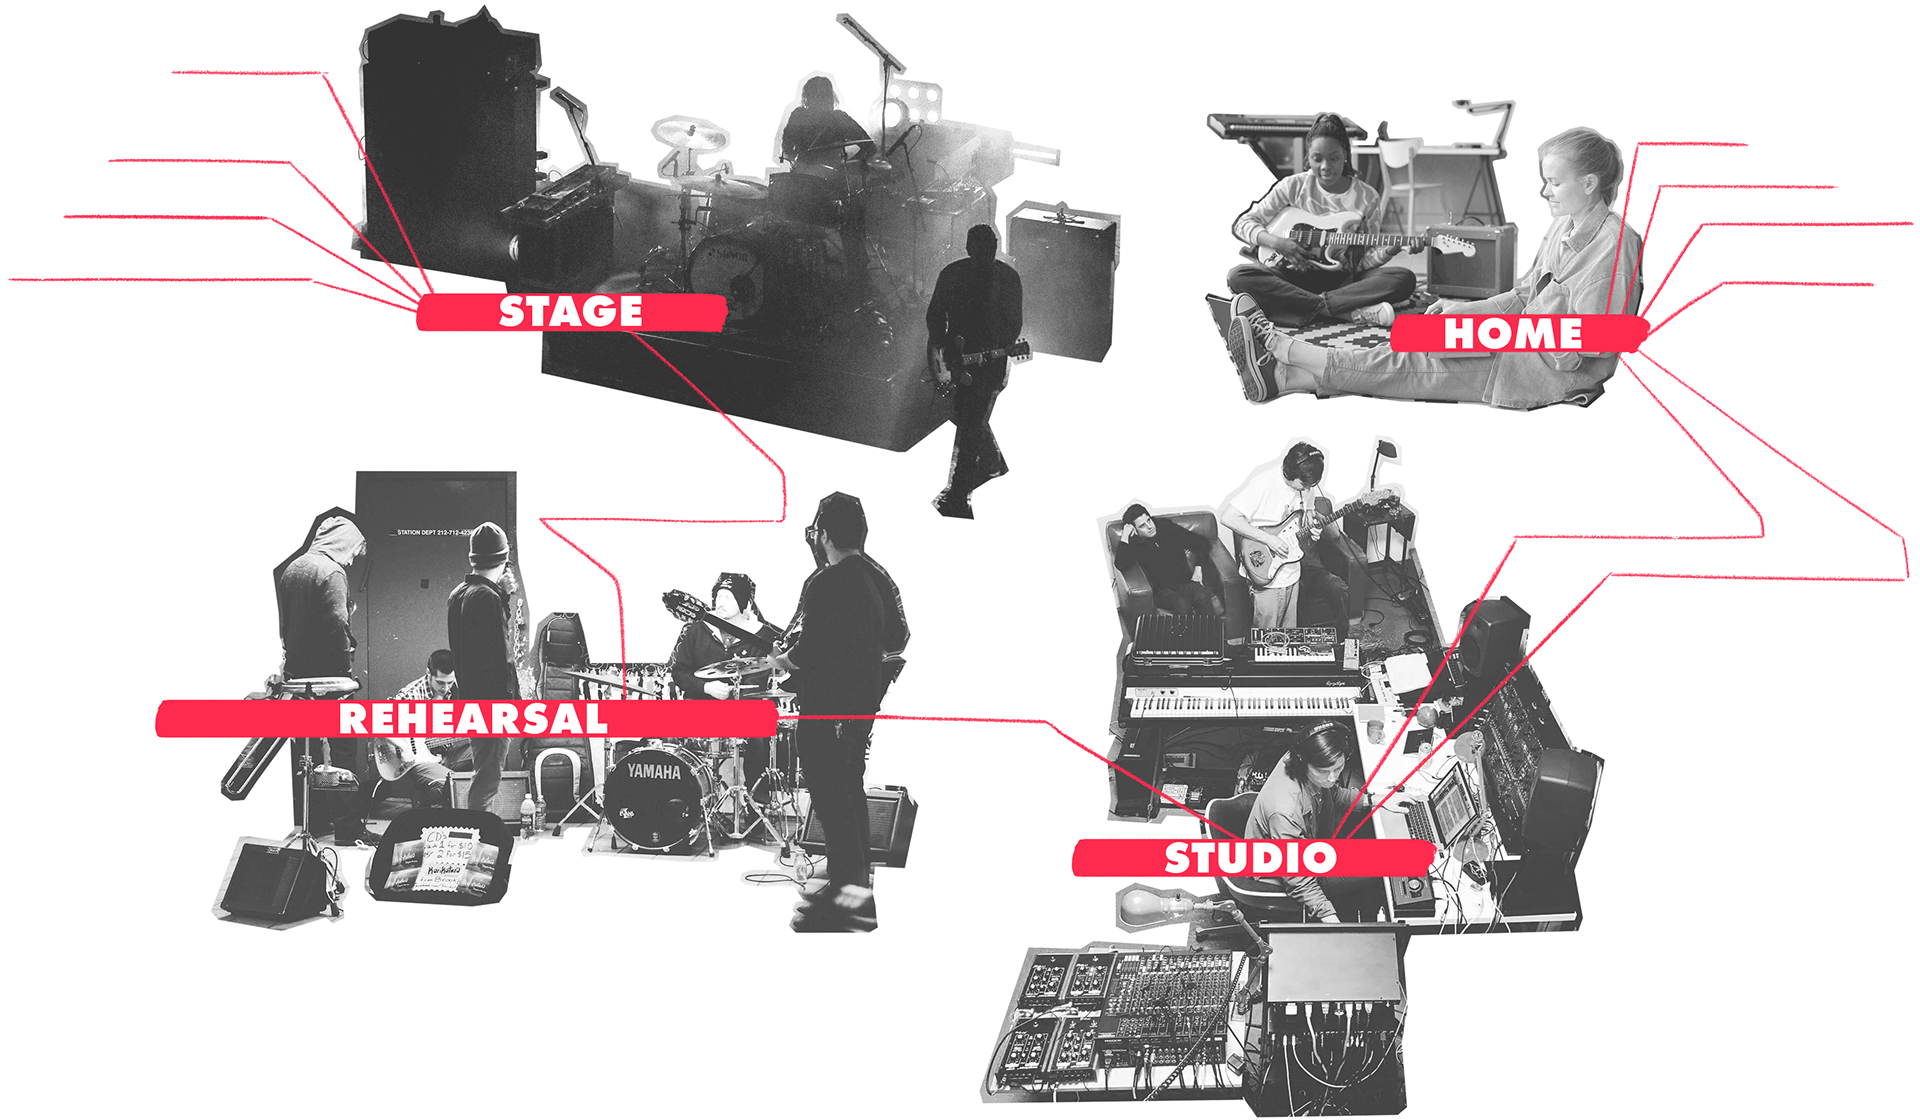
Environment
What are the surroundings like?
The various environments amplifiers are present in, challenge the product with the need for adaptation.
When performing on stage, the lighting conditions and time pressure can hinder the quick and faultless dialling and recalling of the amplifier's settings.
These issues can also affect use when playing at home or in the studio, but usually to a less dramatic degree.
The scenario that the amplifier is often turned off and then unexpectedly greets you with a booming volume when returning for your next session is a big and potentially dangerous problem - whether for your own eardrums or those of your neighbours.
Design
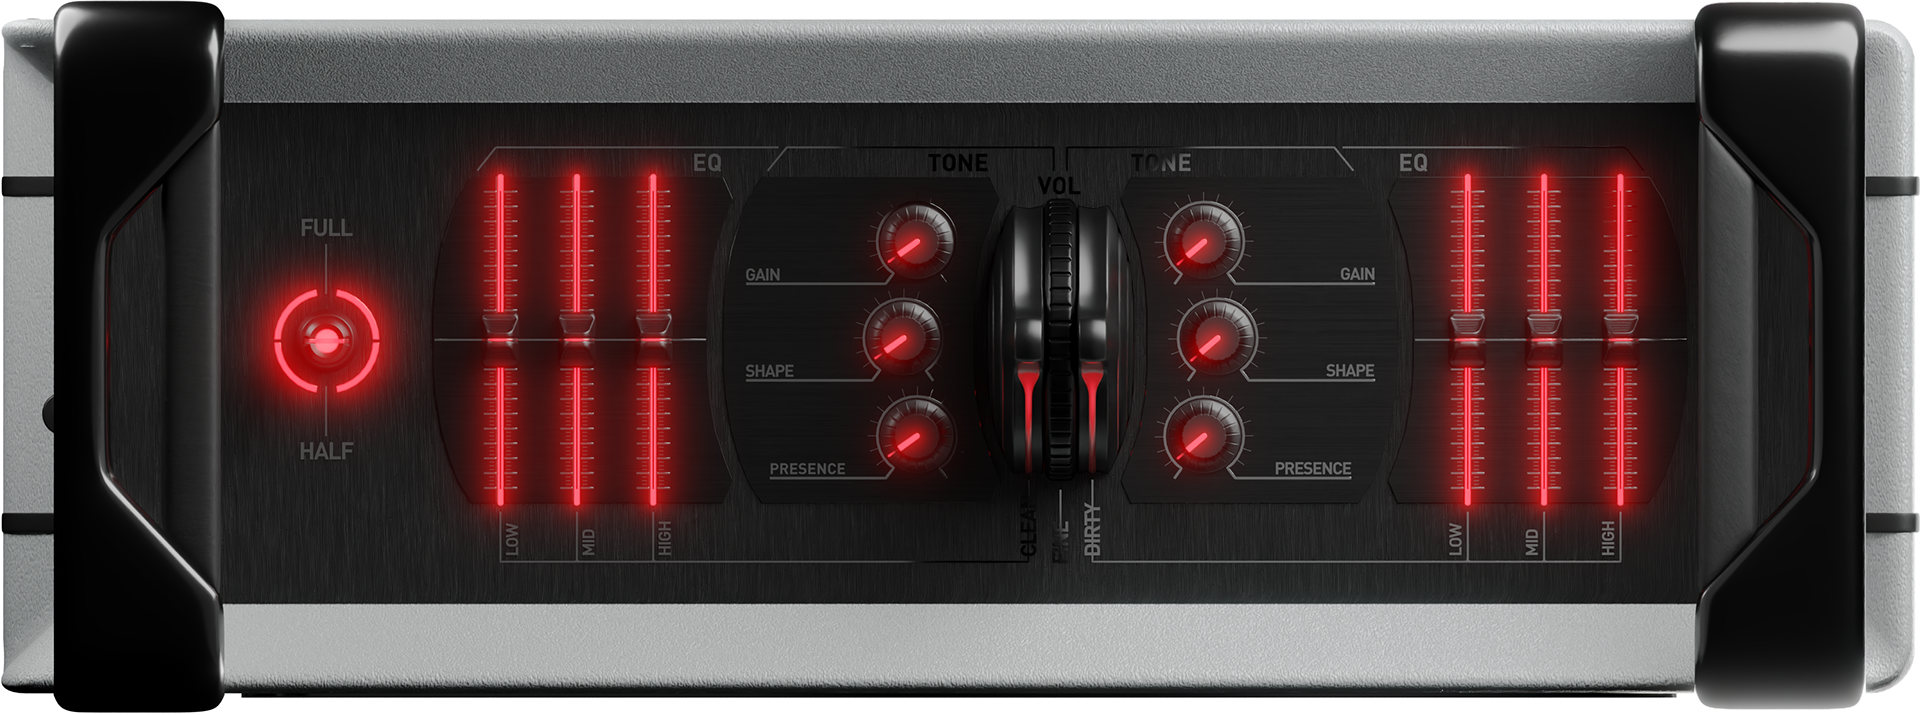
4-State Toggle
[ Element 01 ]
For tube amplifiers, it is common to toggle between four states during a session. The first state is just the amplifier being powered off.
The second state then powers on all electronic components, initiating the tubes' heating phase. It simultaneously functions as the amplifier's standby state, cutting the sound yet leaving the tubes heated.
States three and four are standard in amplifiers with a higher wattage, so users can toggle between a louder and quieter mode, which are optimised for either stage or recording and practising scenarios respectively.

Slider
[ Element 02 ]
While not being standard, having a built-in equalizer is always very helpful in achieving your desired tone and accommodating for users' maybe not-so-well-treated rooms.
The EQ is controlled by a slider element, each of them controlling either of the three bands [lows, mids and highs] on their respective channels. LED elements indicate both the horizontal scale and anchor respectively, as well as the directional indication through the vertical rail the slider is guided by.
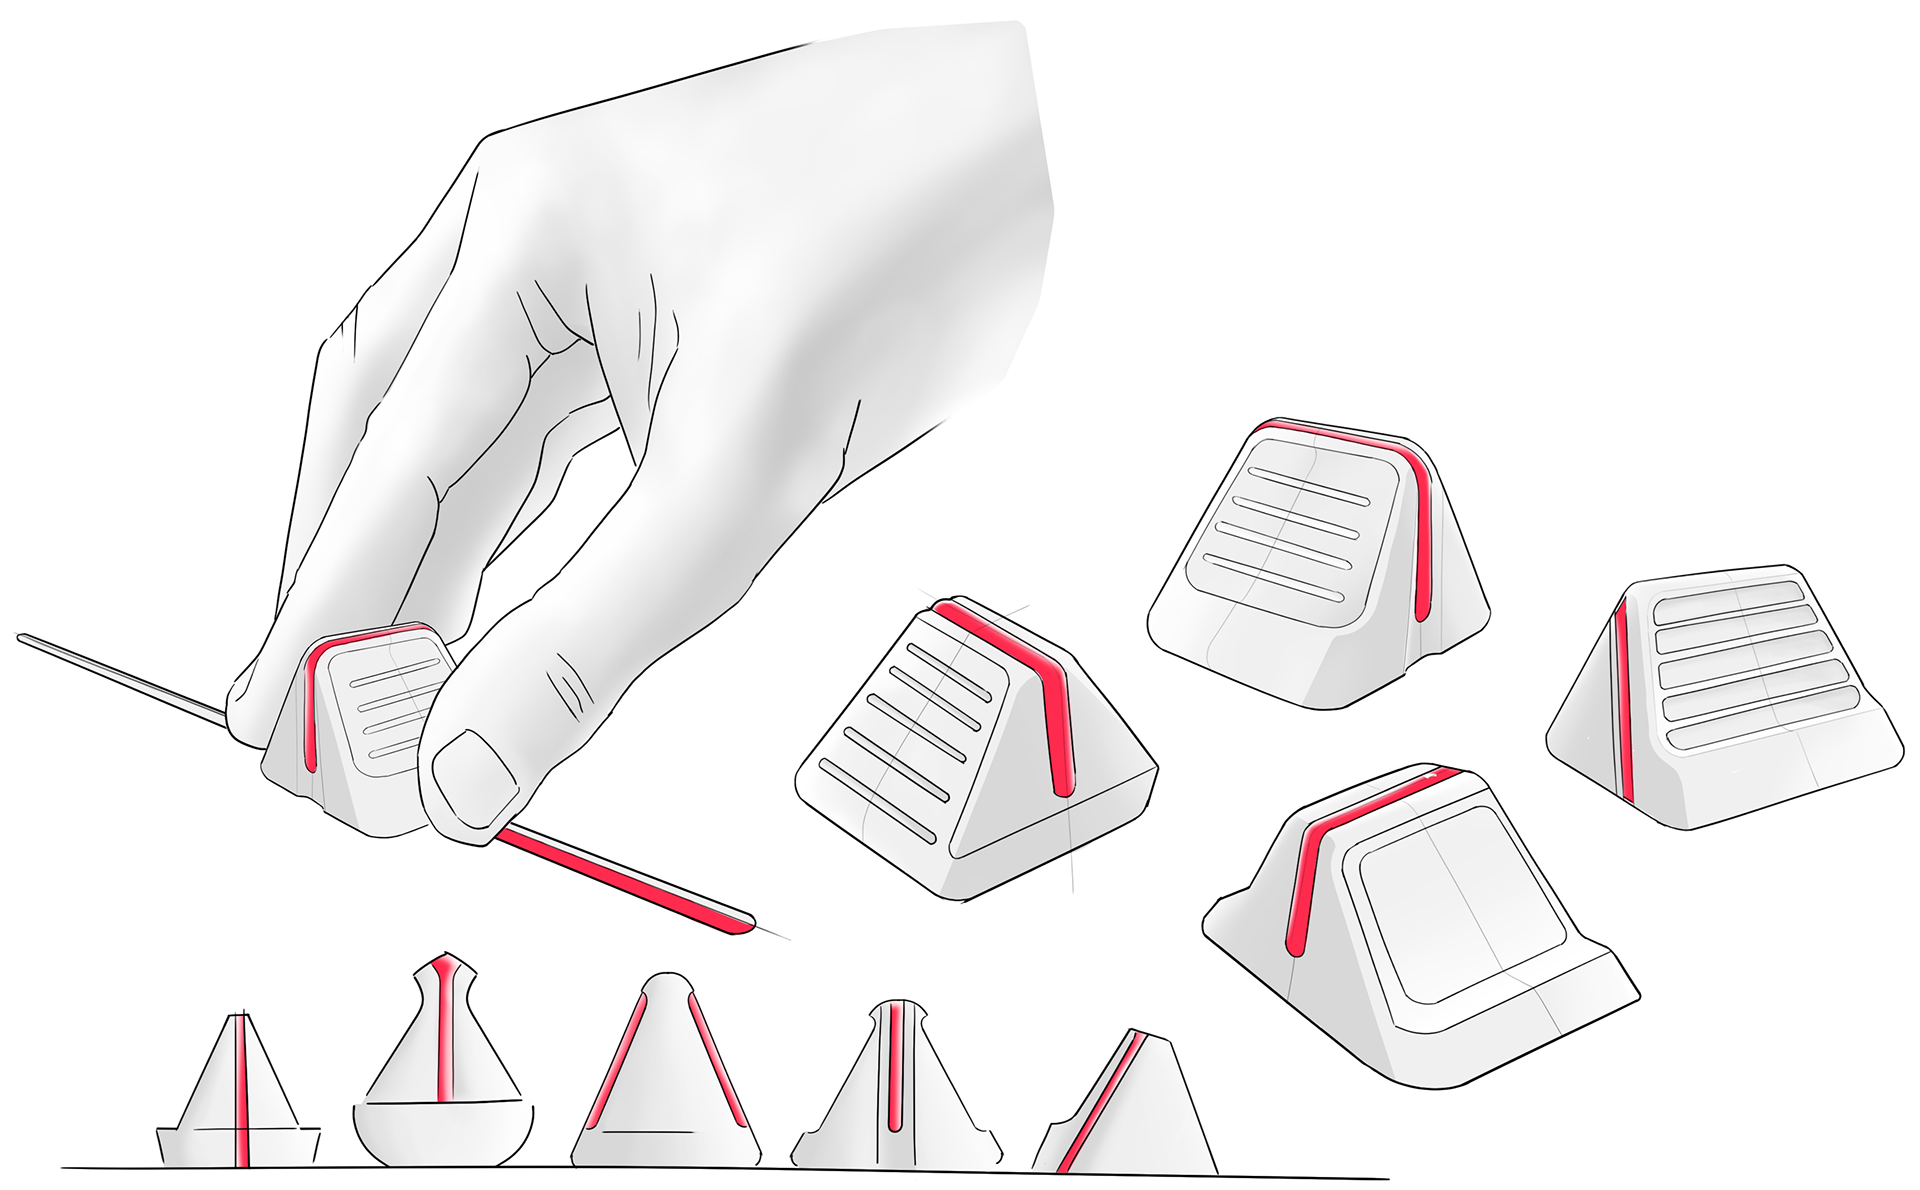
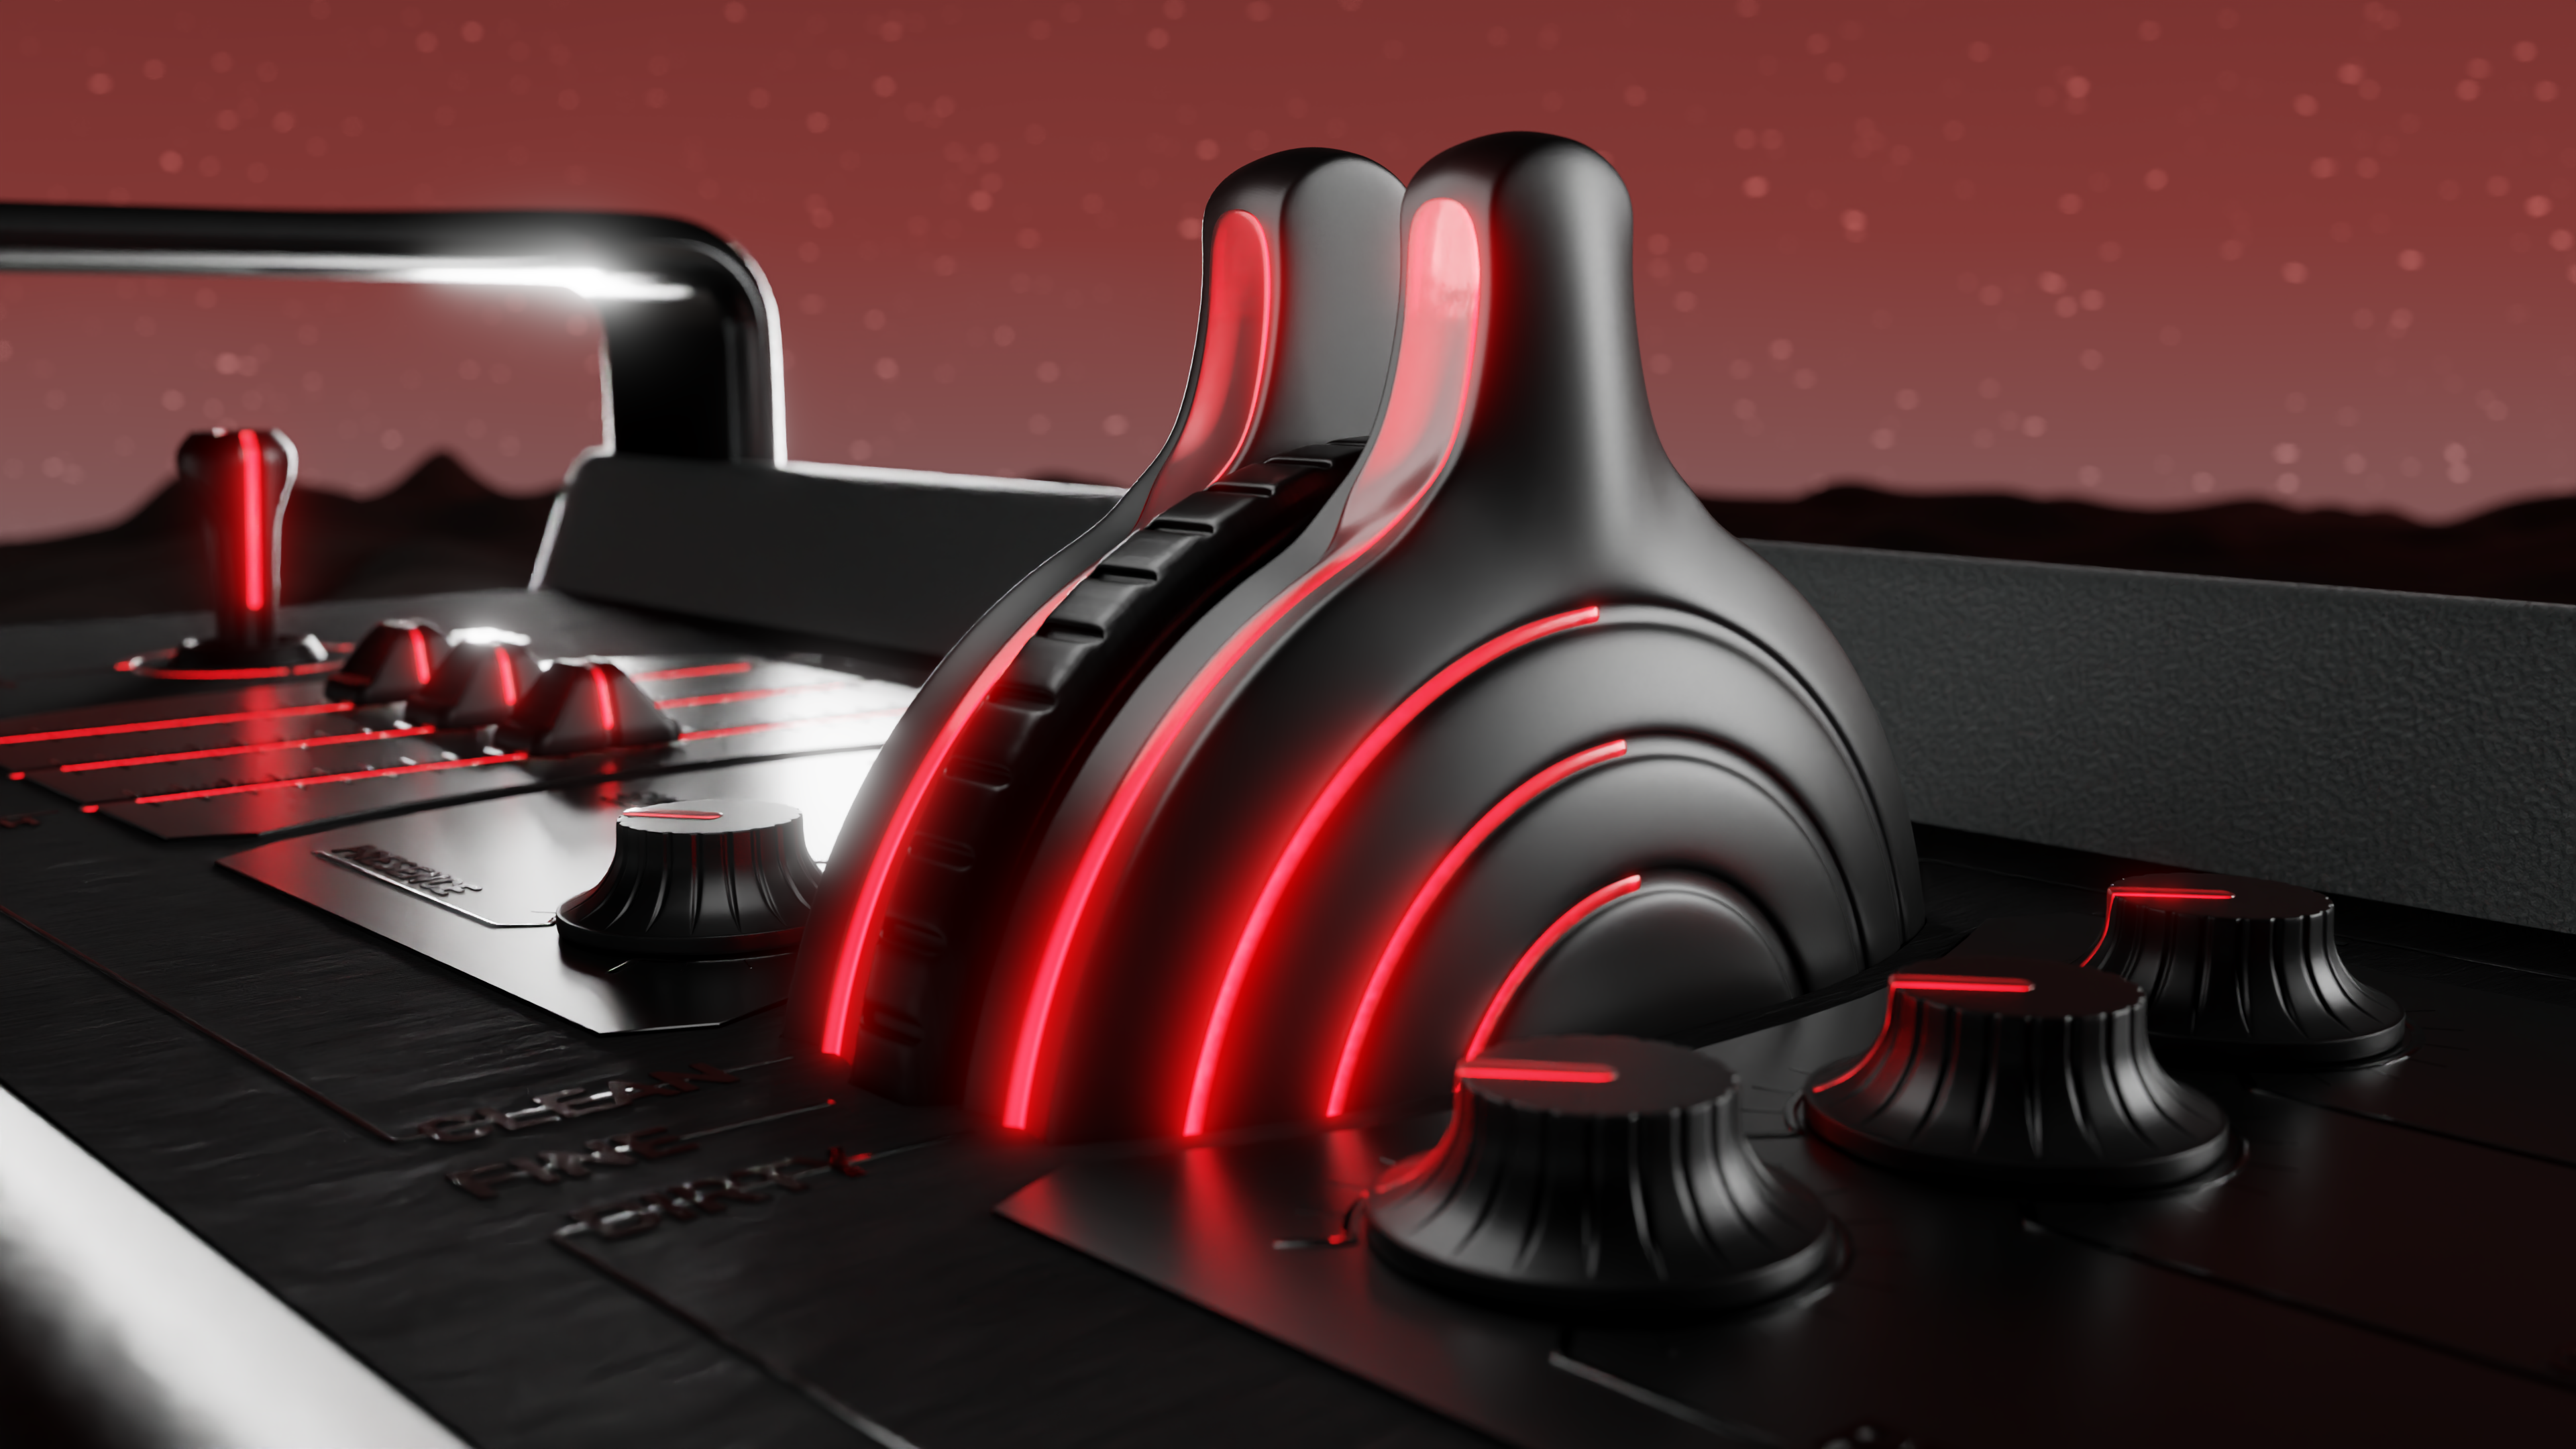
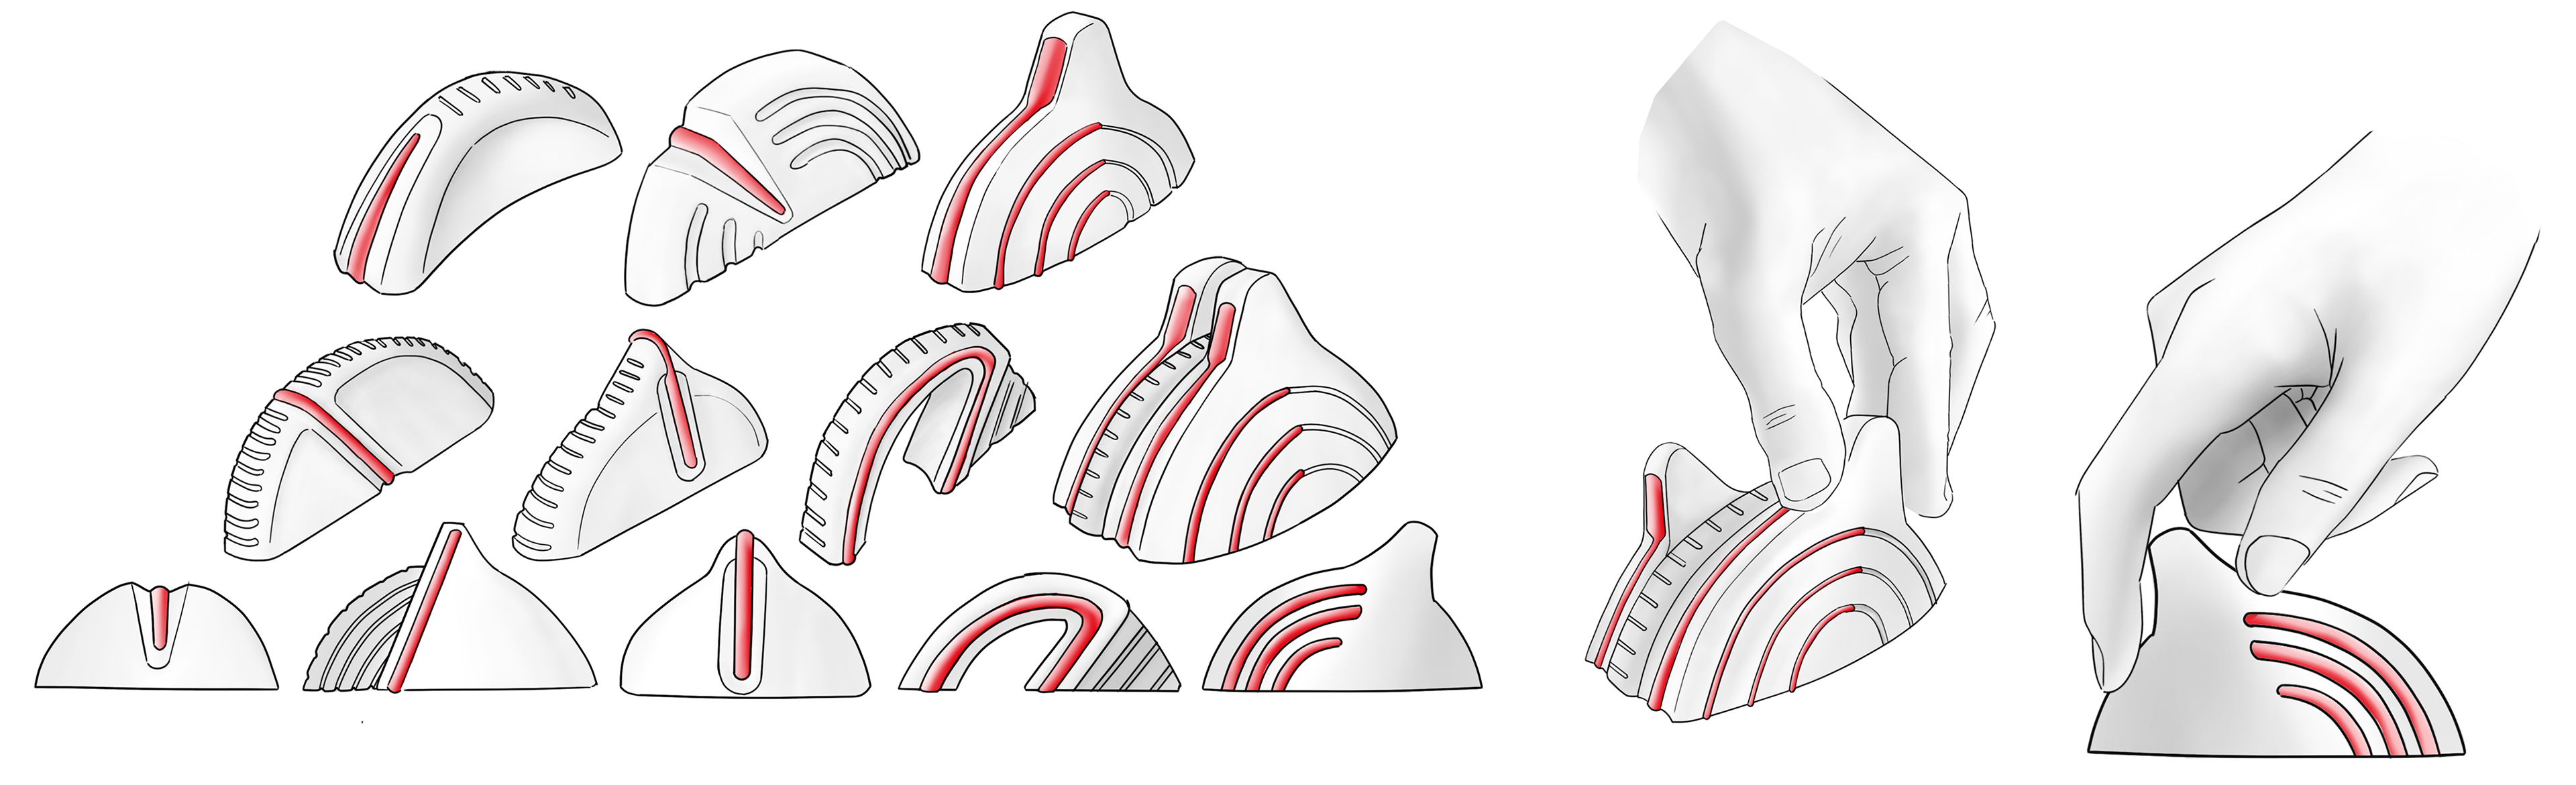
Rotary
[ Element 03 ]
The rotary element controls the volume of the two respective channels. Additionally, a simpler wheel placed in the middle of the two halves allows for finer adjustments.
This is especially helpful when working in low-volume scenarios, as the tubes often have a deadzone on the lower end, which can result in sudden and harsh volume in- or decreases.
With its size and design, the rotary element captures the users' attention, aiming to remind them of the volume they are currently subjecting themselves to.
Layout
Top-View
[ Control-Elements ]
Toggling between the states off, standby, full and half initiates the session and is clearly disconnected from the playing part of the session.
Therefore, the Toggle is placed to the left and set apart from the rest of the hub, by the missing backplate.
The volume control is the anchor of the hub, acting as the initial step, as well as the most important and essential parametric. It also separates the two channels with different distortion modes.
Outward from the volume control, the elements are arranged in ascending importance and order of use.
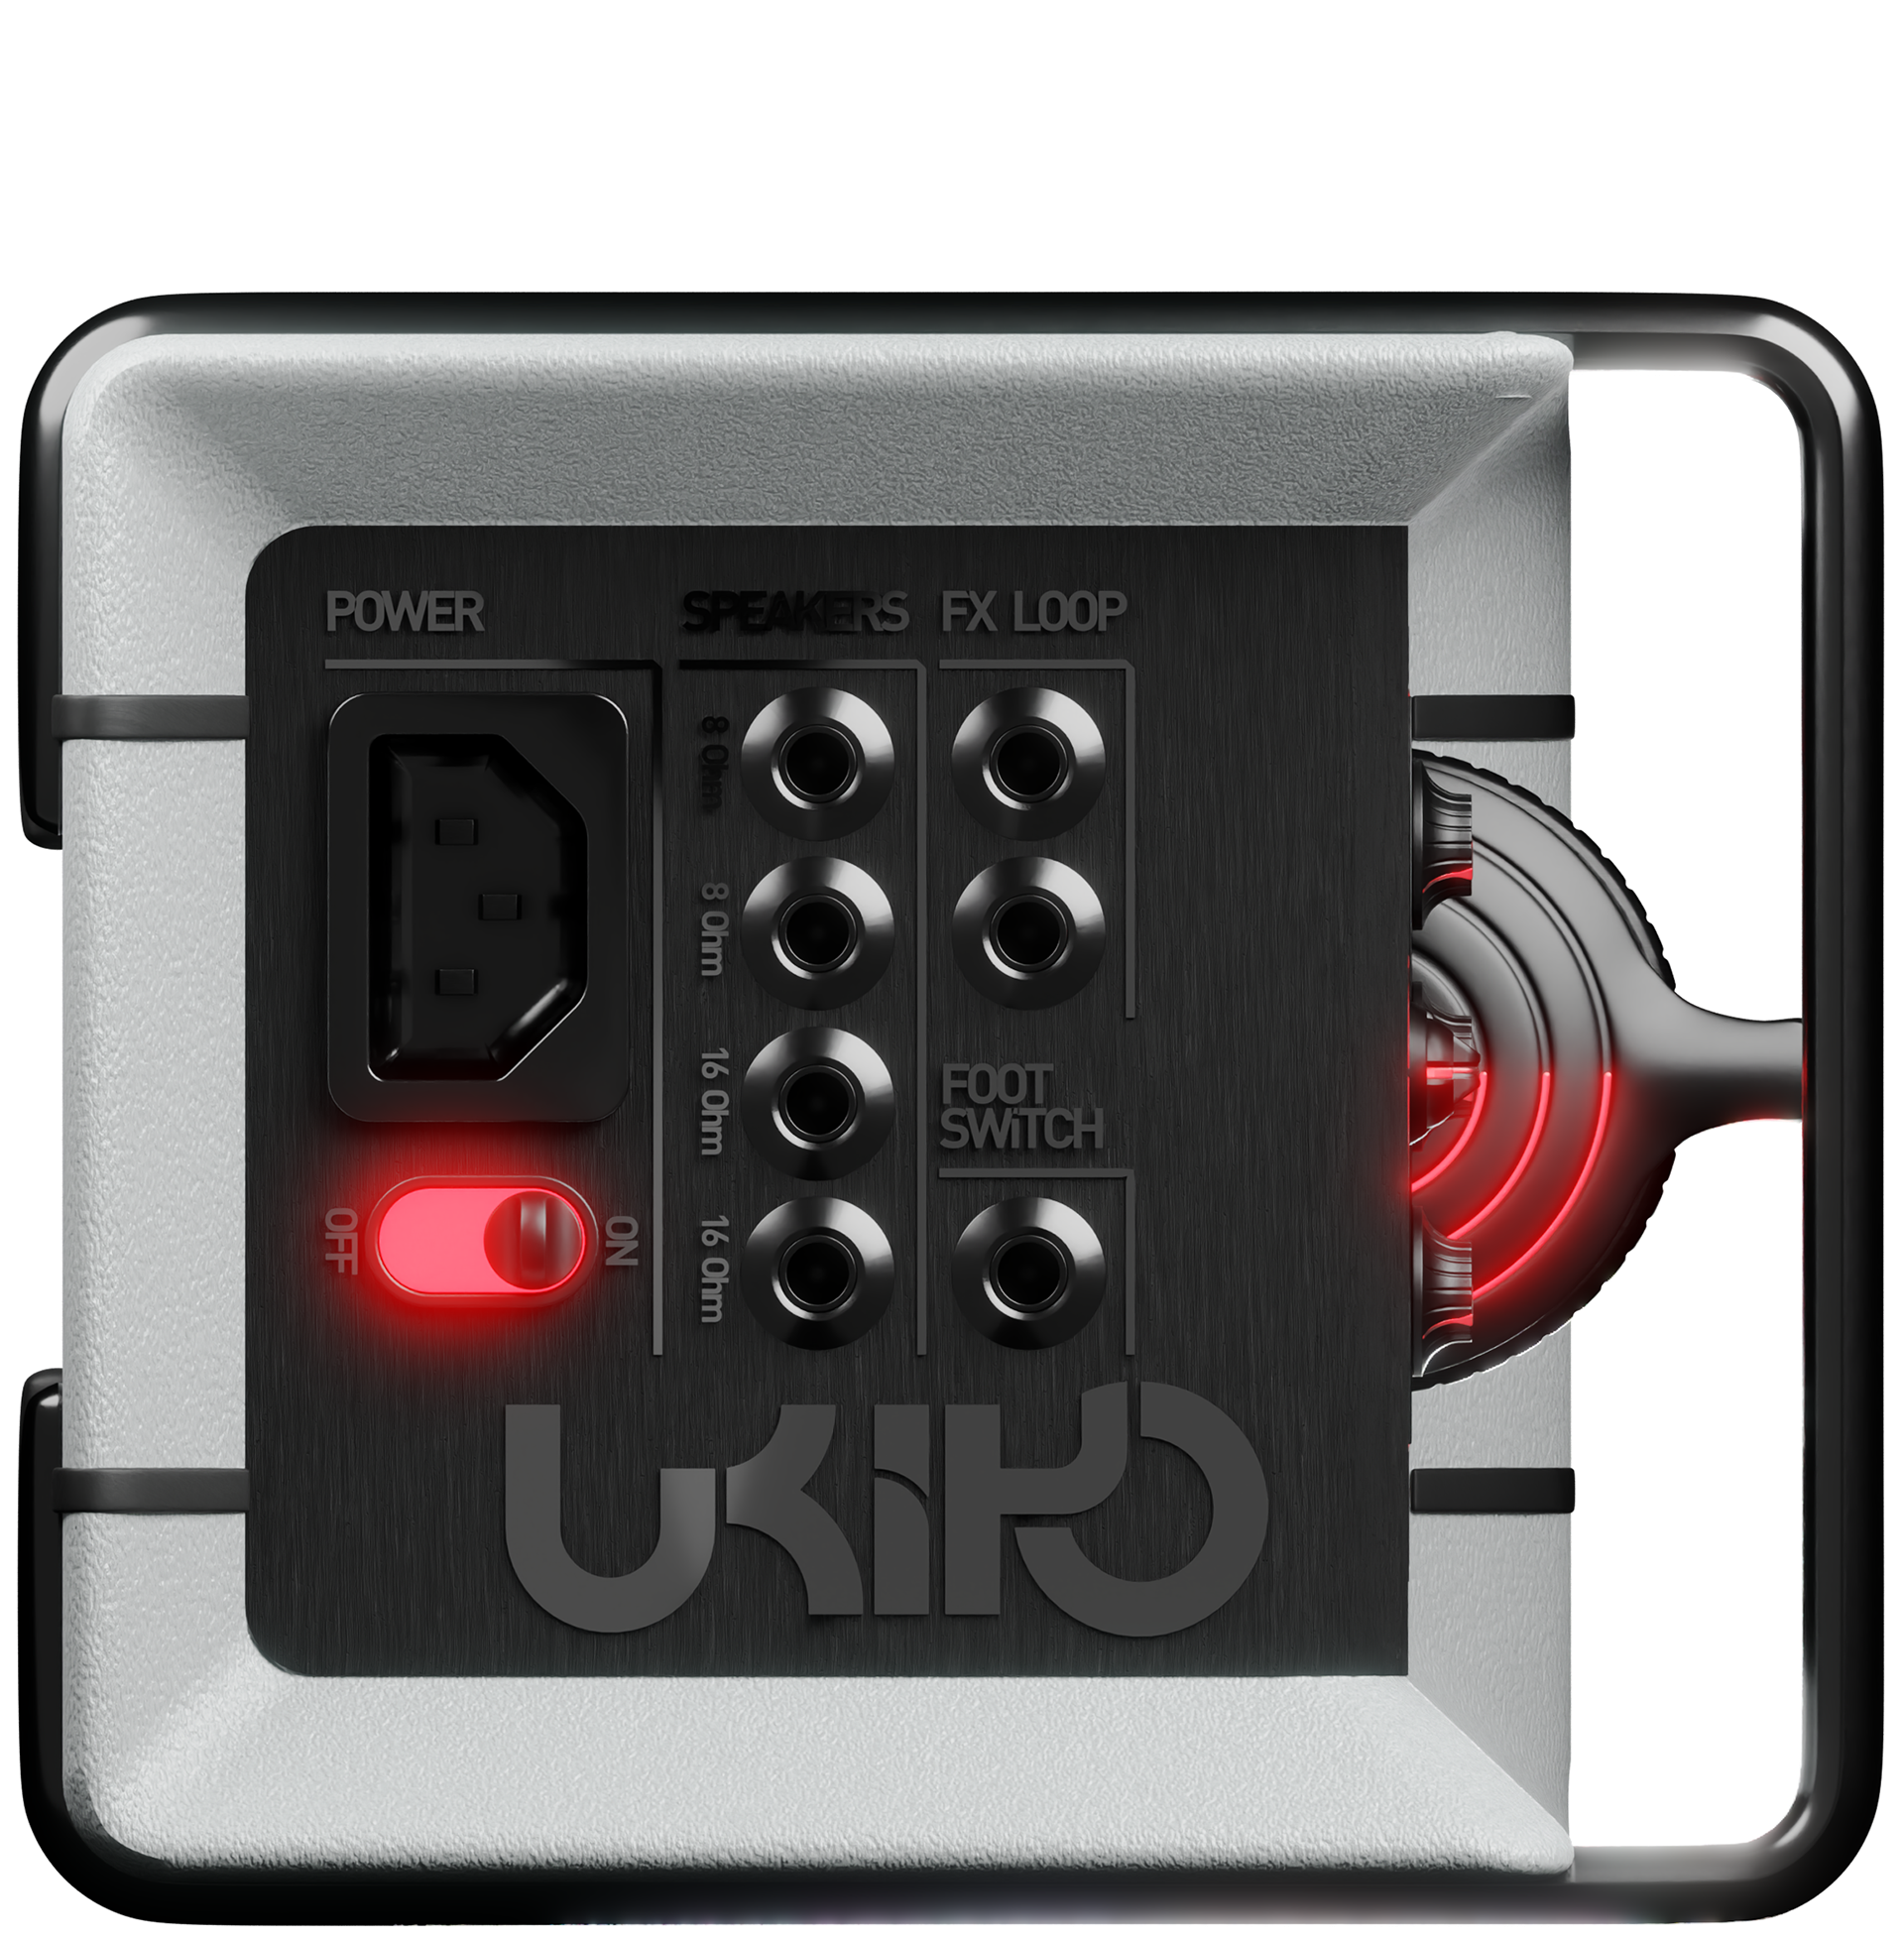
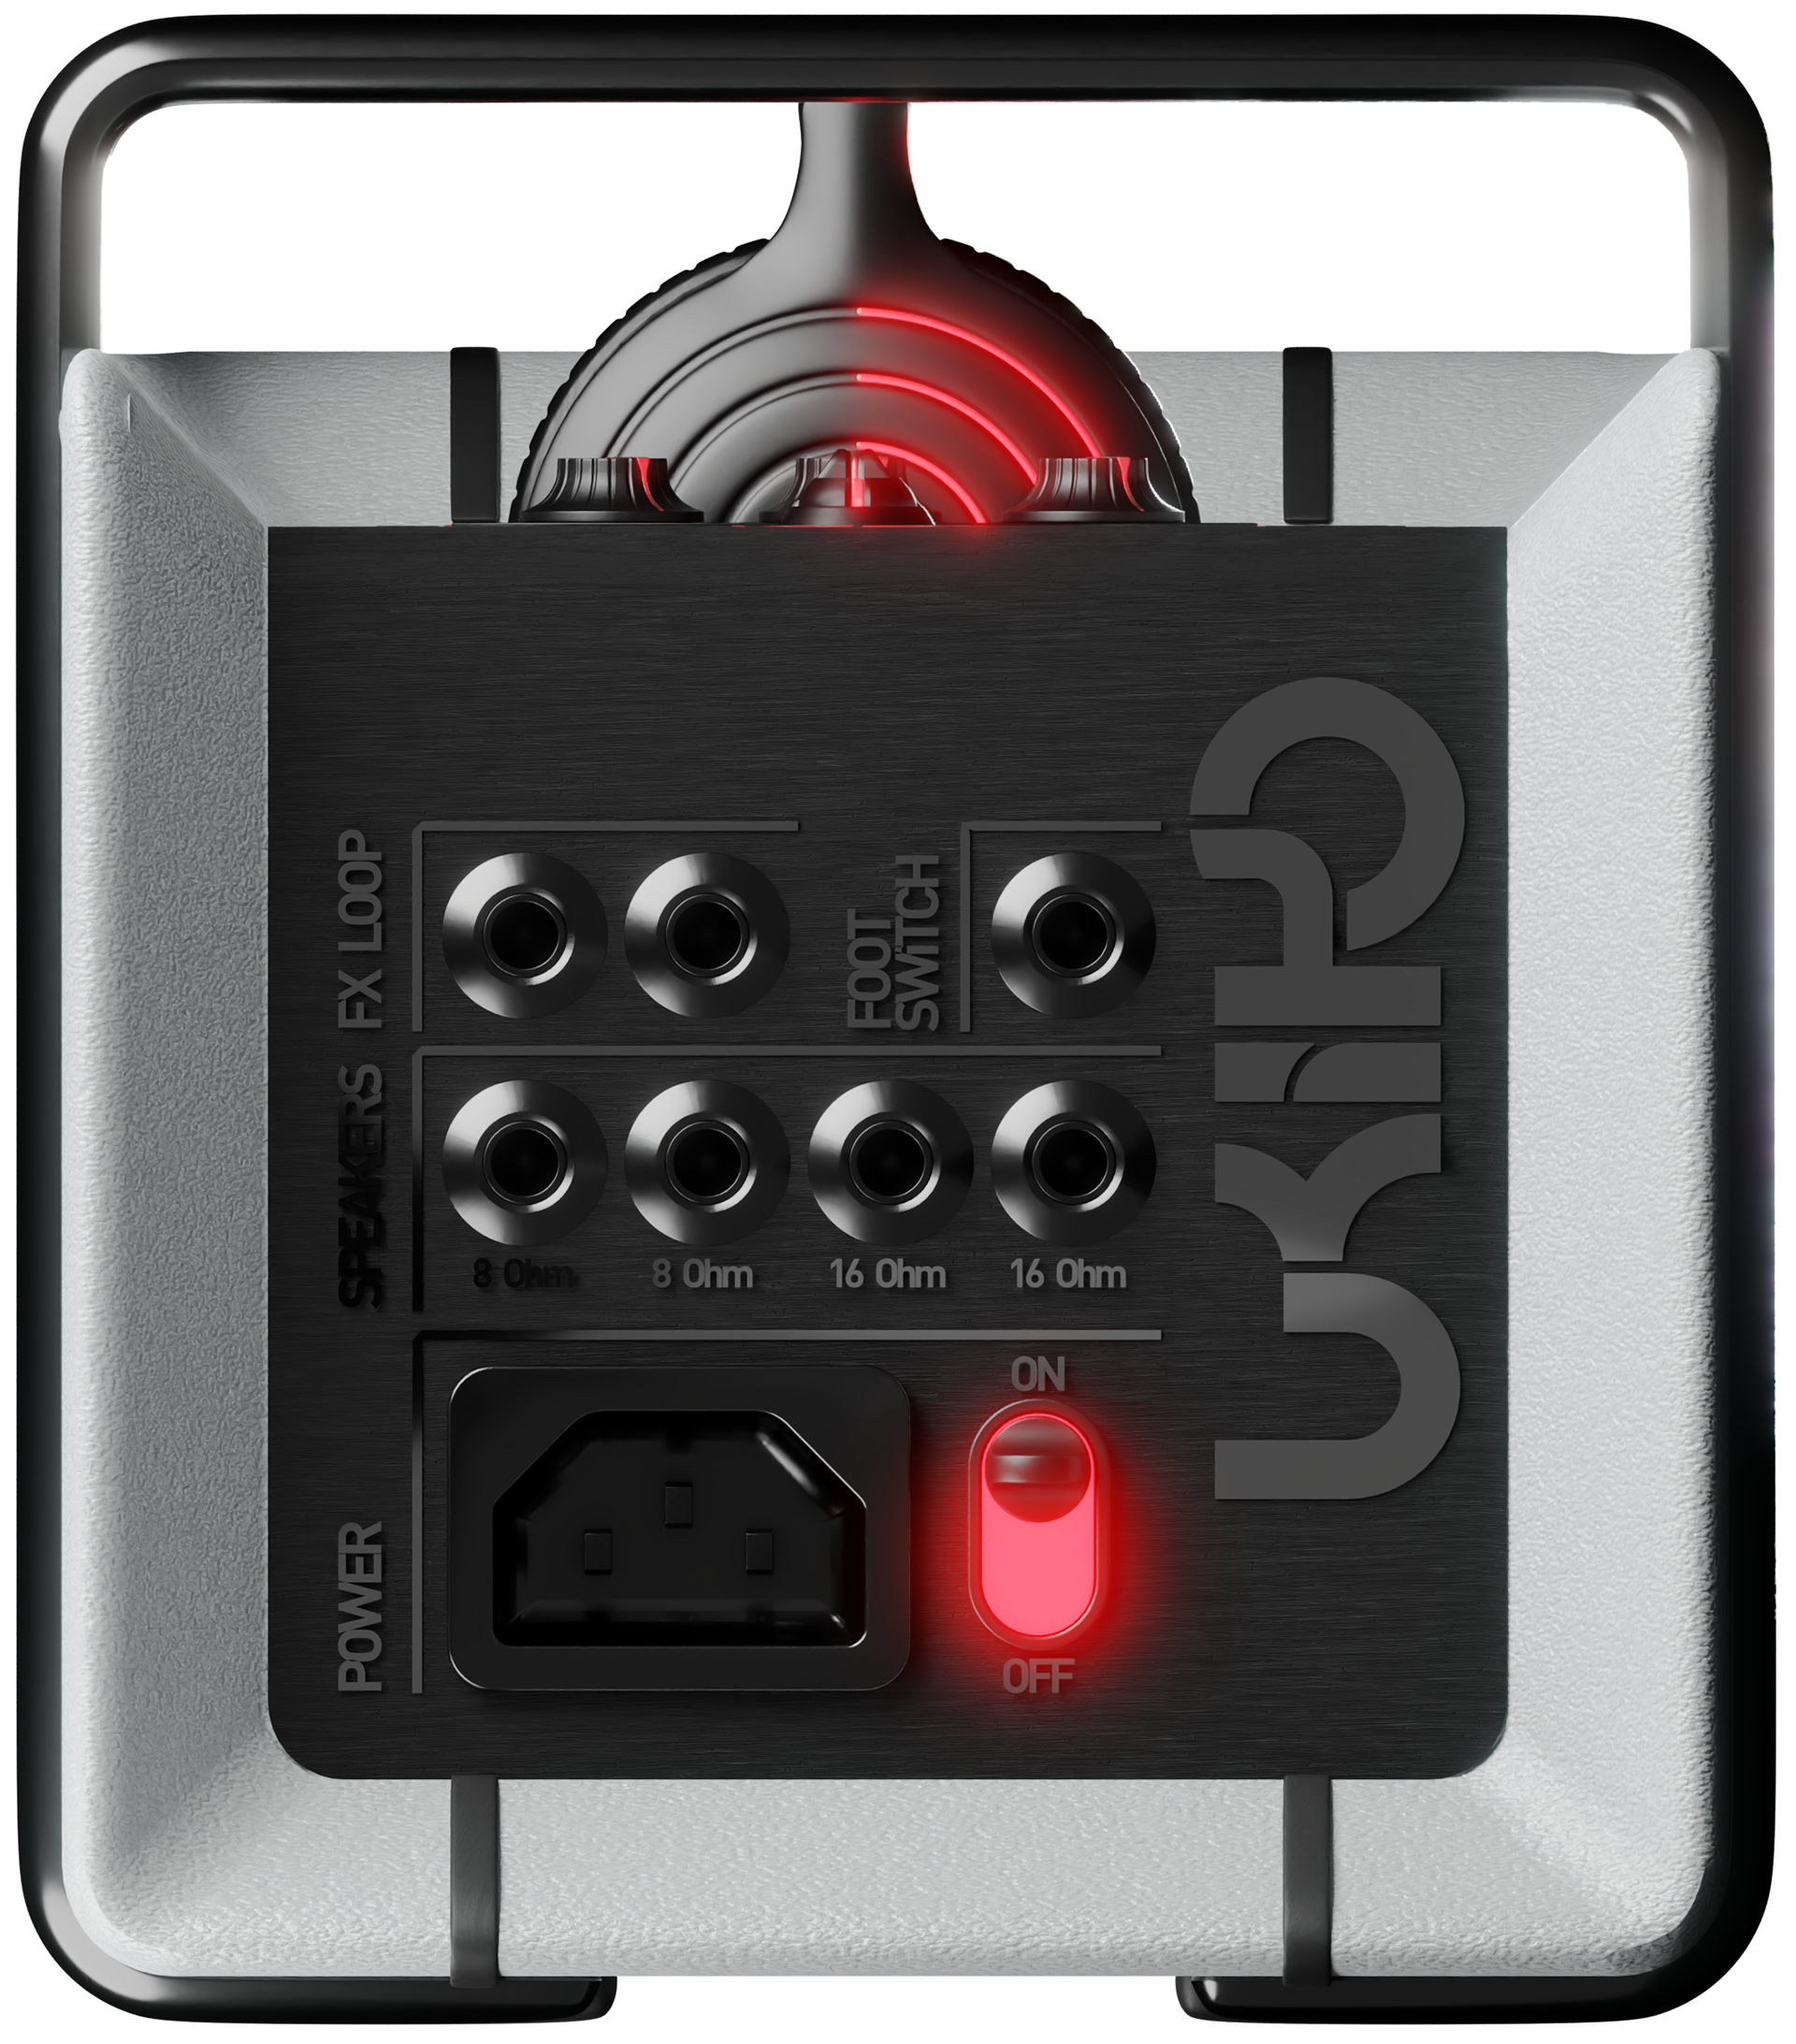
Side-View
[ Cable-Elements ]
To facilitate an adaptive workflow, the in- and outputs for speakers, fx loops, a foot switch and the main power socket are located on the side of the case.
The left side was chosen, as similar to our reading order, we initiate the process from the left.
There, the sockets are grouped into their respective peers and again ordered from left to right [or bottom to top] according to the order in which they are to be used.
This particular arrangement also guides users toward the control hub during the setup process.
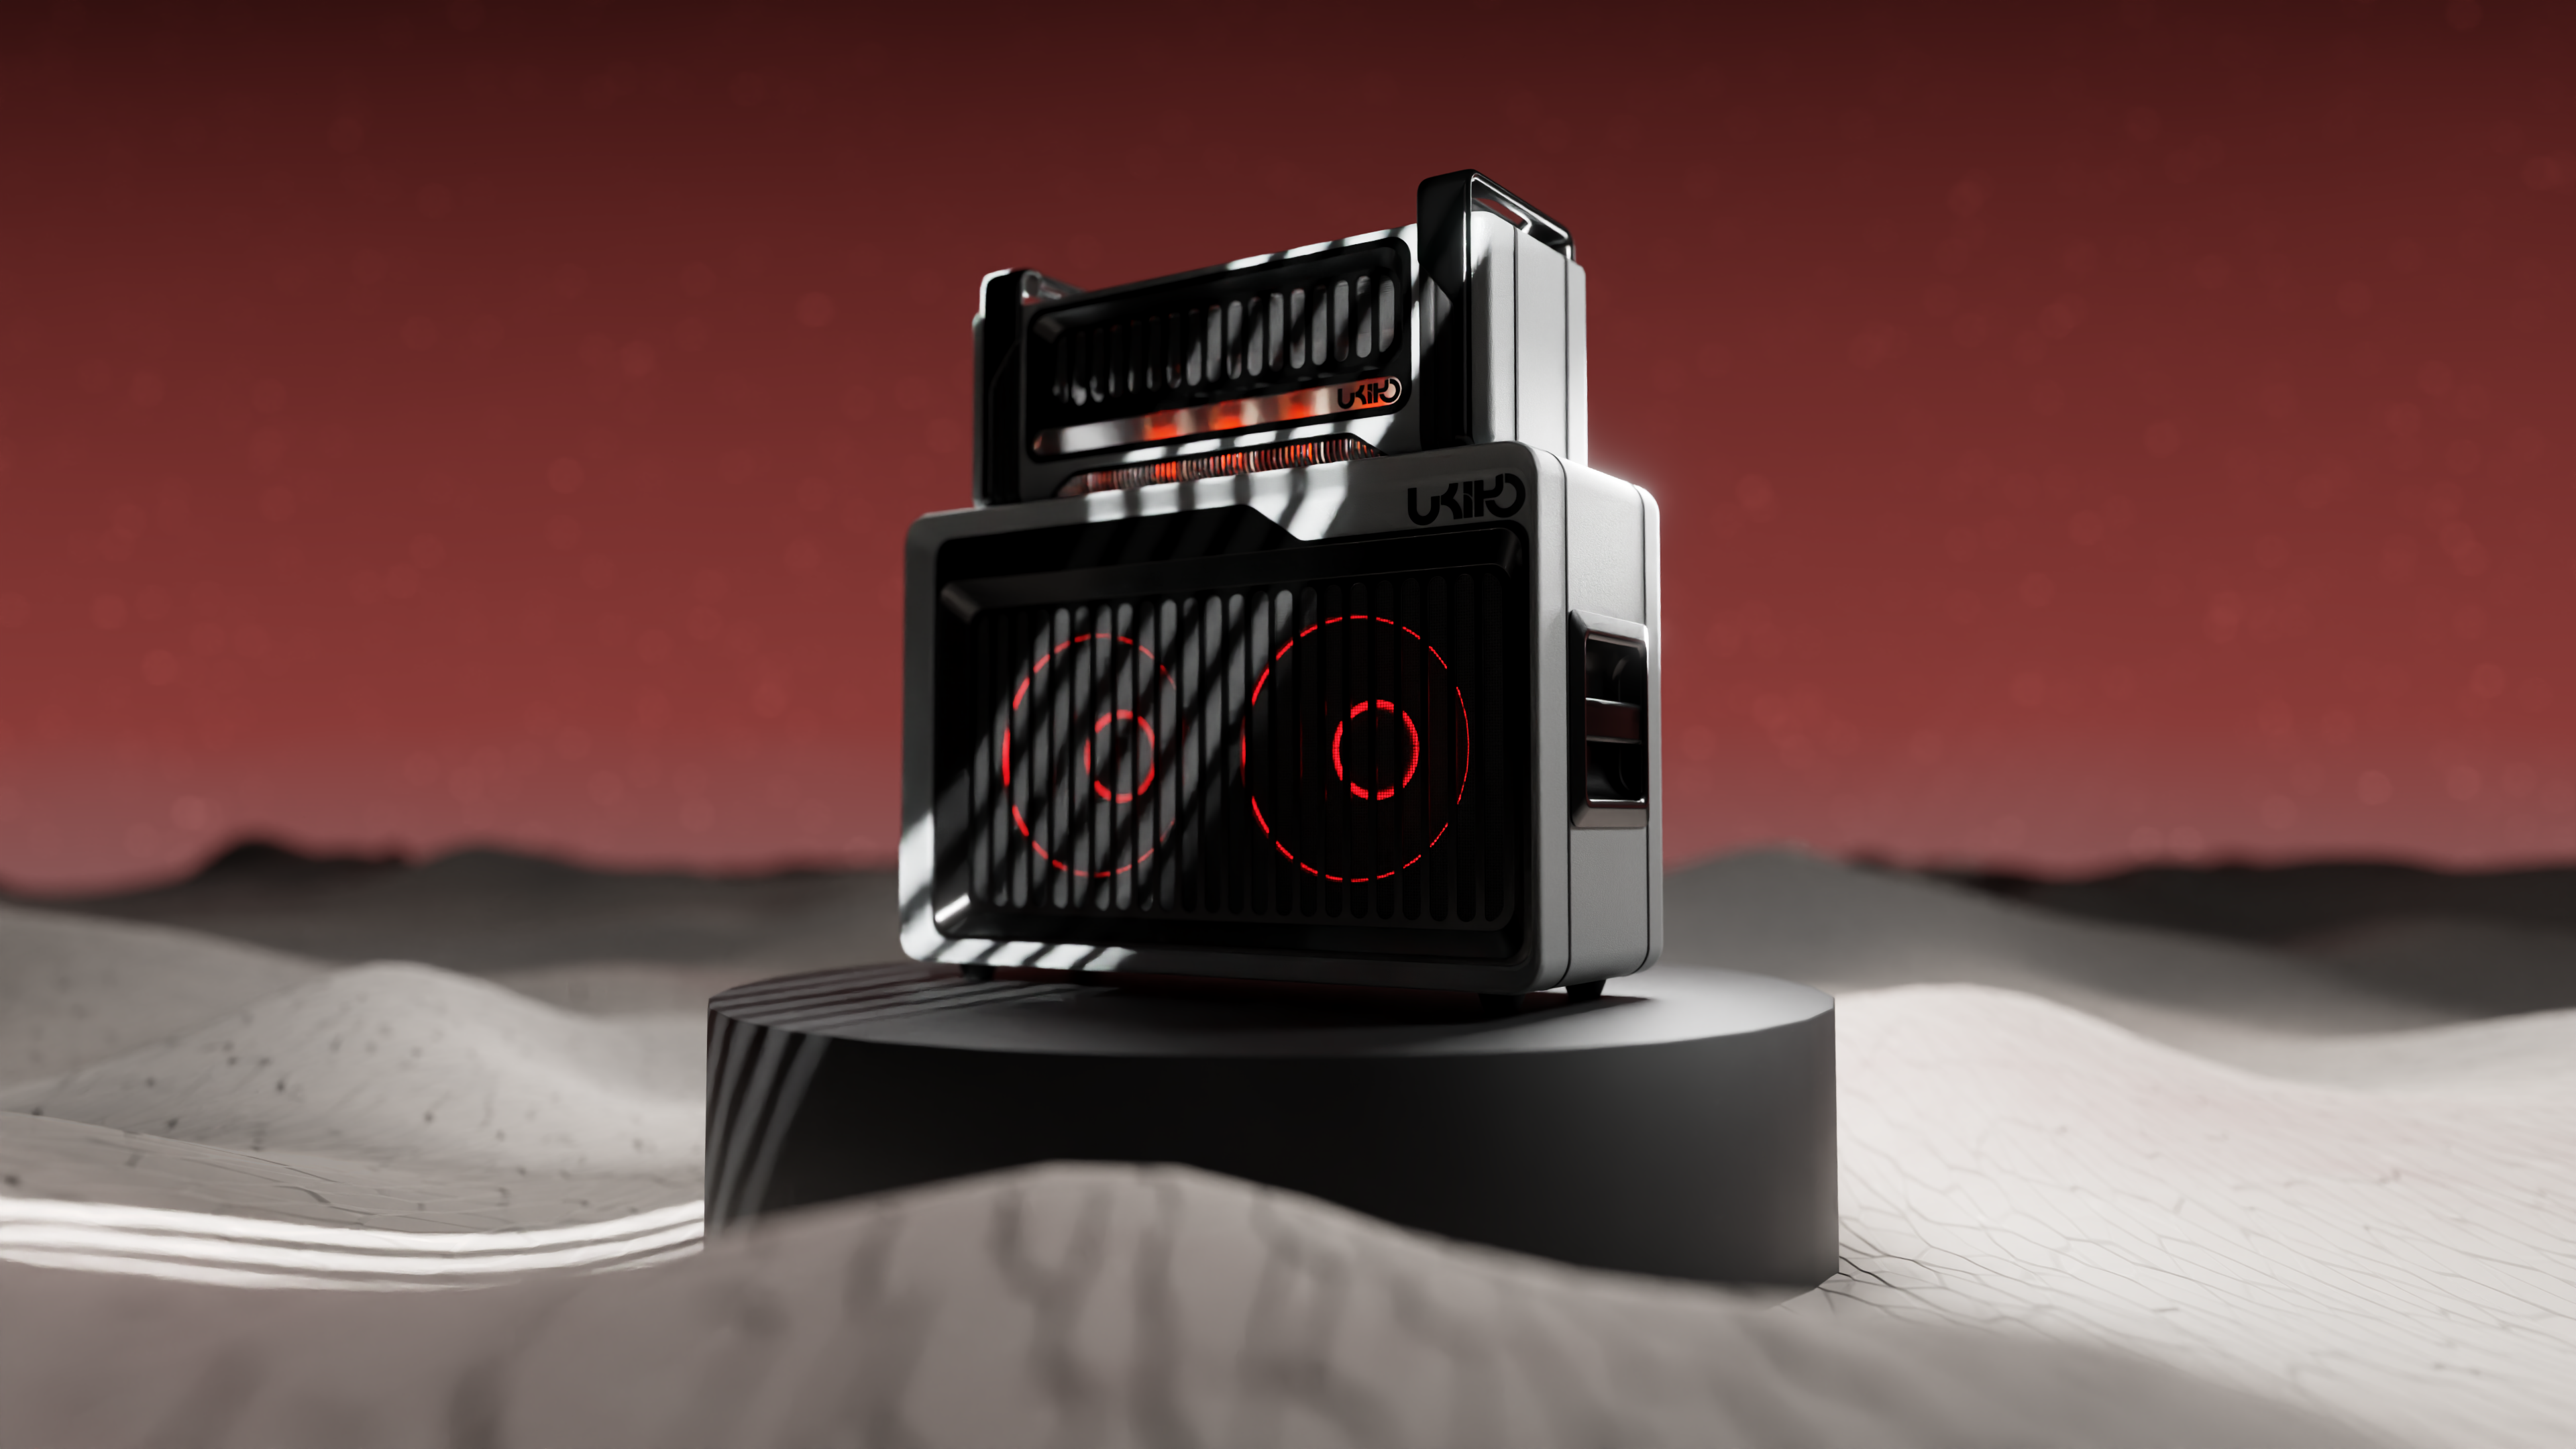
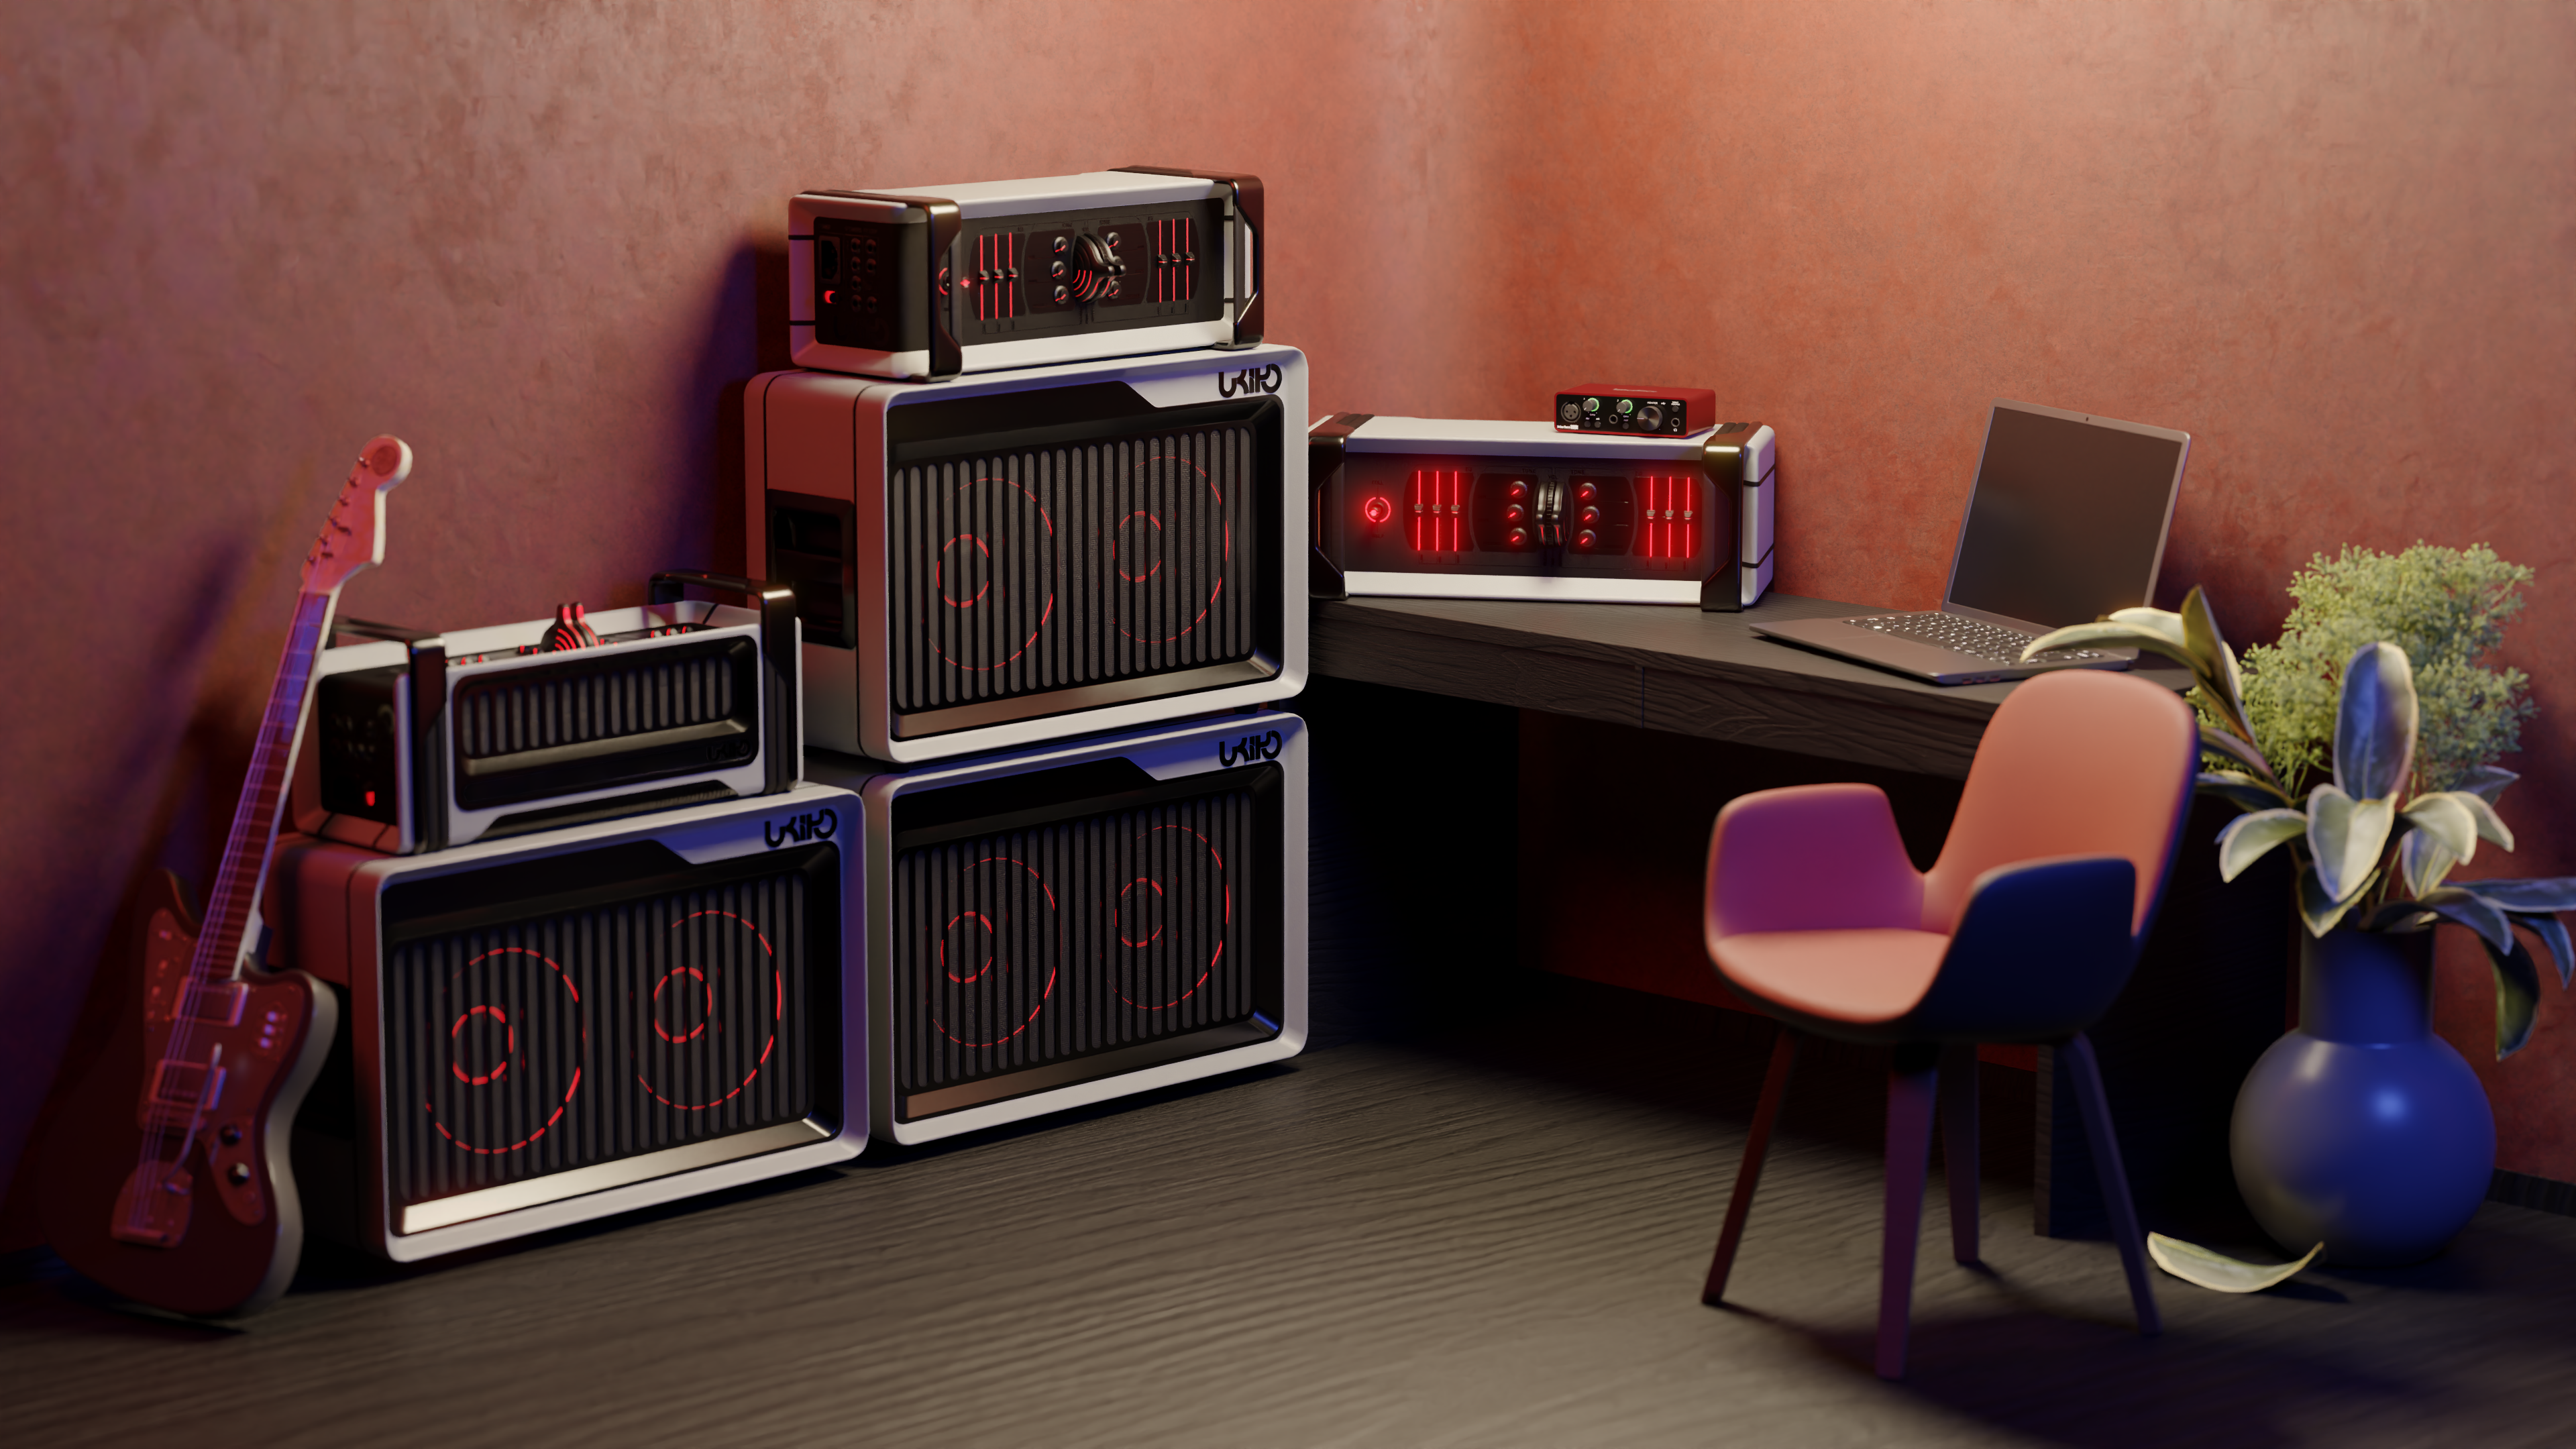
Renderings
Ukyio
[ Colourway:Bloodmoon ]
Concluding the design, the product was constructed, textured and rendered in a combined workflow between Solidworks and Blender. The environment assets in the last scene were taken from the BlenderKit library.
The overall appearance of the product, as well as the surrounding environment, was inspired by both the visuals and sound design of the respective metalcore genre, which combines neo- and cassette-futurism.